[Fresh & Frozen by Pan/Oven/Stove]
Transform your kitchen into a culinary haven with these delightful dumplings filled with enticing flavors. Join us in the gratifying adventure of crafting pierogi. And you're invited to join in on this gratifying adventure. Whether you're molding fresh dough or using frozen pierogi, learning how to make these delicious treats can offer a rewarding kitchen experience. Let us fuel your love for these endearing dumplings and inspire you with our treasured recipe.
Here's your guide to creating homemade pierogi:
- Gathering Ingredients: Prepare your dough and filling ingredients.
- Preparing the Dough: Combine and knead the dough, then give it to rest.
- Rolling and Cutting: Spread the dough, and cut it into uniform circles.
- Filling and Sealing: Place filling, fold into semi-circles, and seal tightly.
- Cooking: Boil pierogi until they float, optionally sauté for added crispiness.
- Serving: Dish out warm with your sauce of choice.
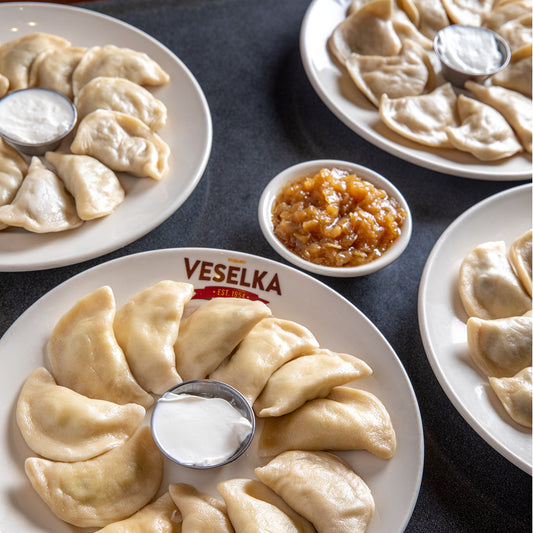
At Veselka, we remain committed to tradition rather than dietary fads. Our beloved potato pierogi are an enduring treasure, as our skilled chefs craft 3,000 of these delights daily.
While this recipe doesn't produce such an extensive amount, it is quite generous. We encourage you to make the full batch and freeze any extras, as they can be cooked directly from frozen. The dough can also be stored for future use. Or, succumb to the temptation and enjoy more than the Veselka standard of seven pierogi in one sitting. Indulgence in such tradition is a joy, not a guilt.
This recipe makes 65 to 70 pierogi, serving 8 to 10.
Preparation
Pierogi Dough
- 1 large egg yolk
- 1 cup whole milk
- 1 tablespoon vegetable oil
-
3¼ cups all-purpose flour
Topping and Filling
- 4 tablespoons unsalted butter
- 5 cups finely chopped onion
- 4 cups mashed potatoes (leftovers are fine)
- 4 ounces of farmer's cheese
- 2 teaspoons salt
- ¼ teaspoon freshly ground black pepper
To Assemble
- 2 large egg whites
- All-purpose flour, as needed
- Sour cream, for serving
Making The Dough
Creating the perfect pierogi begins with mastering the art of the dough. It's a blend of humble ingredients transformed into a canvas for your culinary creativity. Here are the steps to make the dough:
- In a small bowl, whisk the egg yolk, milk, ½ cup of water, and vegetable oil together for a minute. Make a well in the center and gradually add the wet ingredients, incorporating them with your fingers or a fork.
- Once all the liquid is added, start kneading the dough with your hands. If it's too sticky, sprinkle more flour in, one teaspoon at a time, to keep the right texture.
- Move your dough onto a floured board and knead for three minutes. If it's still sticky, add more flour sparingly. When it's smooth, shape it into a ball, place it in a small bowl, cover it with plastic wrap, and let it rest in the fridge for 20 minutes. Meanwhile, clean your workspace for the next steps.
Making Topping and Filling
As your dough rests, let's create some culinary magic with the topping and filling:
- Begin by melting the butter in a large sauté pan, setting the stage for the symphony of flavors to come.
- Add the onions to the pan and sauté over medium heat. Stir occasionally as they cook in the butter, transforming into a beautiful golden brown over about 10 minutes.
Now, let's assemble our filling:
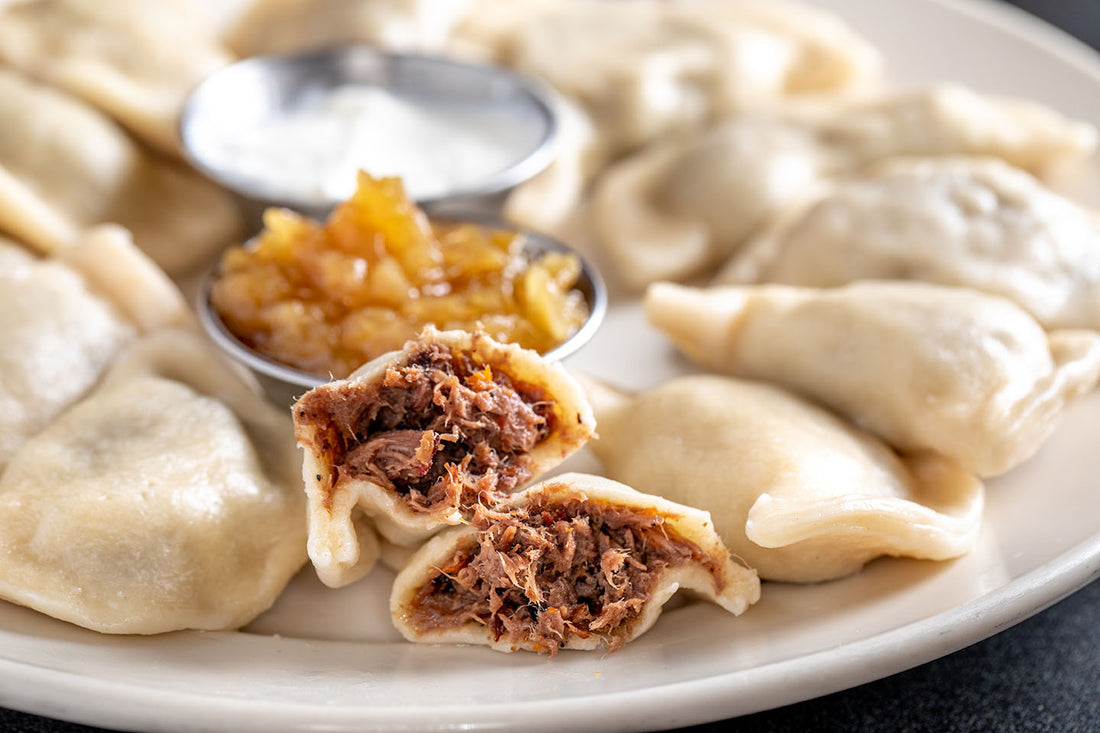
- In a large bowl, combine ¾ cup of the sautéed onions with the mashed potatoes, farmer's cheese, salt, and pepper. The filling now resembles a rustic mosaic of flavors, waiting to be enveloped in your dough. Let it rest untouched at room temperature.
- Save the remaining onions - they will add a finishing touch to your pierogi later.
Your toppings and fillings are now ready.
Rolling and Cutting
When it's time to put your dough to use, gather your tools and get ready to shape your pierogi:
- Prepare an egg wash by whisking together 2 egg whites and 2 tablespoons of water in a small bowl, keeping it close to your workspace.
Equip yourself with:
- A pastry brush
- A rolling pin
- A teaspoon (the ordinary tableware kind, not a measuring spoon)
- A fork
- A round cookie cutter around 2¾ inches in diameter (alternatively, a jar lid or juice glass will do the job)
Set aside a floured tray, platter, or board to receive your finished pierogi.
Now, let's breathe life into our pierogi:
- Split your dough into three portions. Roll out one section on a well-floured surface until it's about 1/6 inch thick.
- Use your cookie cutter to create dough circles. In the center of each circle, place a generous teaspoon of your previously prepared filling, leaving a small margin clear around the edge.
- Gently brush the egg white mixture around half of the edge of your dough circle. Then, carefully fold your dough over the filling, creating a half-moon shape.
- Secure the pierogi by crimping the edges with your fingers or a fork.
- As each pierogi is crafted, gently place it onto your floured tray. Keep them in a single layer with no stacking.
Repeat these steps until every piece of dough and filling has been transformed into a delicious pierogi. Your labor of love is now ready for the final stage.
Cooking and Serving
It’s time to get cooking:
- Fill a large stockpot about three-quarters full with salted water and set it to boil with vigor.
- Once the water is boiling, gently lower three or four pierogi into the water using a slotted spoon or skimmer. Let them cook in the boiling water for about 4 minutes.
- Afterward, remove each pierogi using your slotted spoon, allowing them to drain. Then, transfer them gracefully to a serving platter.
- Continue this process with the rest of your pierogi, ensuring the water returns to a full boil each time.
Finally, the time for savoring has arrived:
- Once all your pierogi have been cooked and arranged on your serving platter, it's time to dress them for the occasion.
- Scatter the reserved golden sautéed onions over the top, adding a delightful crown to your pierogi.
- Then, generously garnish them with as much sour cream as your heart desires.
The table is set, and your pierogi are ready. Enjoy the fruits of your culinary journey and share the warmth and tradition of this delightful Ukrainian dish.
Note:
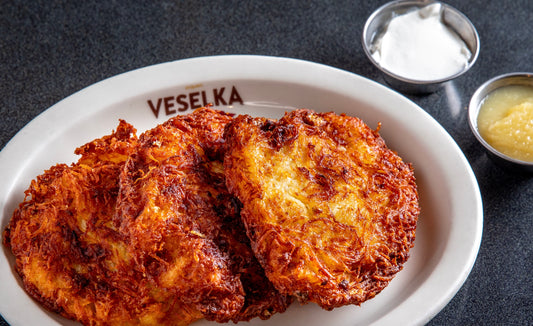
- Fried Pierogi: For a crispier version, boil pierogi only for 2 minutes, then sauté in butter until golden brown.
- Holiday Potato Pierogi: For a festive twist, omit the farmer's cheese and add more mashed potatoes to the filling. Perfect for Christmas!
FAQs
Here are the answers to some frequently asked questions about preparing pierogi.
How do you cook frozen pierogi?
Cook pierogi from frozen by boiling until they float to the top, then sauté if desired.
How to cook pierogi in a pan?
Sauté boiled pierogi in a pan with butter and onions until golden brown.
How to cook pierogi in the oven?
Arrange boiled pierogi in a single layer on a baking sheet, drizzle with oil, and bake at 375°F until golden, about 20 minutes.
How to cook pierogi on the stove?
Boil pierogi on the stove until they float, then sauté if desired.
How to cook pierogi with onions?
Sauté boiled pierogi with sliced onions in butter until both are golden brown.
How to cook packaged pierogi?
Follow the package instructions, which typically involve boiling and then optionally sautéing the pierogi.
Do you boil pierogi before frying them?
Yes, boiling ensures the pierogi are cooked through before frying, giving them a golden finish.
How long to boil pierogi before frying?
Boil pierogi until they float to the top, usually about 3-5 minutes.